Today, we discuss what you can and cannot get away with when enlarging photos. These tips ensure you don’t come back from printers with pixelated images. By the end, you should be confident in knowing how to enlarge a picture for printing.
Easy Methods for Enlarging Photos for Print (High Quality)
Let’s go through four steps to ensure you enlarge your photos for the best quality print.
1. Determine the File Formats Needed to Print
First, check with the printing house or printer to see what file sizes they cater to. Most will use the most accessible format— JPEG. But JPEG files may be lower-quality images. Ideally, you would enlarge photos in their original RAW file. Then you would export it to a TIFF file. TIFFs are a lot less restrictive than JPEGs. But you won’t notice this loss of information if you print JPEGs in a small format (roughly any bigger than A4.) If your digital image is below the high-quality standard, you can use a few techniques to bring them up to scratch. It’s about assessing your current file size and seeing how much you can get away with.
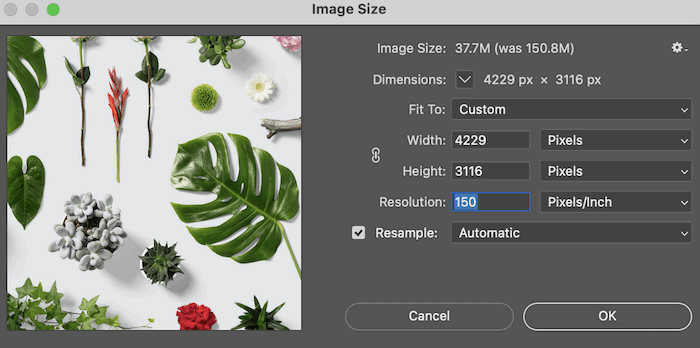
2. Check Image Resolution
When dealing with photo prints, you’re dealing with the photo’s resolution. The resolution determines how sharp your images will be when rolled out of the printer. If you haven’t got a good resolution, there’s not much you can do to make big prints look nice. It depends on how big you print, of course. But you will likely be able to see the pixelation. The easiest way to check your image resolution is to open your image in Photoshop. Go to Image > Image Size, and a window laying out the information will appear. You want to look for the number in the resolution box. This number is measured in DPI (dots per inch). It means how many pixels there are in an inch of the photo. The higher the number, the better the resolution.
Ensure Your Image is High Resolution
The industry standard of a high-resolution image is 300 DPI. Honestly, you don’t want to be printing any images lower than this. If you are taking photos from the internet, you will most likely find them at 72 DPI. Depending on the dimensions, you could print this. But it would not be a high-quality print. At this point, you would have to enlarge your image.
3. Enlarge Photos to Improve Quality
Let’s look at ways of enlarging photos to improve them for print.
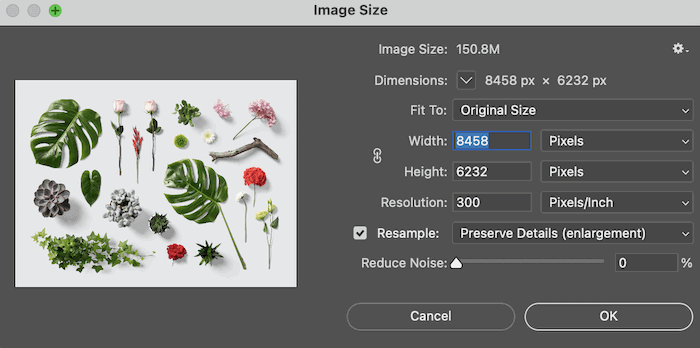
How to Enlarge a Picture in Adobe Photoshop
After assessing your image, you want to start thinking about how big you want to print it. Printing is about negotiating the image size and transforming it without losing quality. The best way to enlarge photos is with Adobe Photoshop. Images can always scale down without losing quality. But it is enlarging photos that is tricky. When enlarging images, the computer creates new pixels for the image. This means the computer program is guessing how to appropriately fill in the gaps between the pixels provided in the photograph. Here are Photoshpo steps to enlarge photos to improve image quality. In the enlarged image, you can sharpen your image if the defining lines around the subjects look a little soft. To do this, follow this guide on how to sharpen an image.
How to Enlarge a Picture in Adobe Lightroom
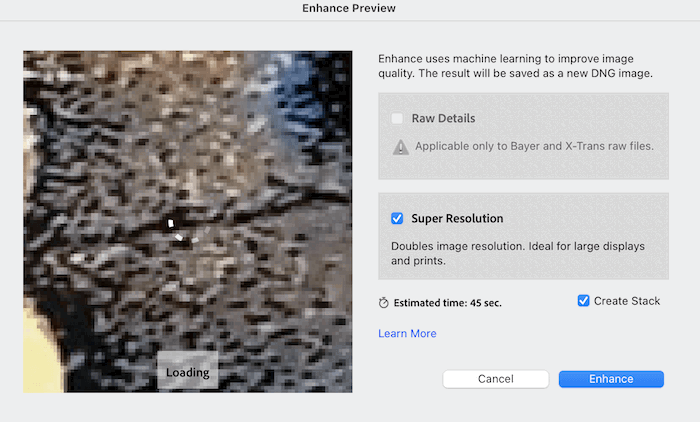
In 2021, Adobe Lightroom announced a Super Resolution feature. This feature can enlarge photos to double the size. The width and the height will be two times the size of the original image and four times the total pixel count without losing quality. At first glance, this seems like a great additional feature to Lightroom. I am a big fan of Lightroom and use it for archiving my images. The editing features they have made an excellent printing prep station. With this added feature, you can easily handle a file through this process:
How to Enlarge a Picture in Reshade Image Enlarger
Suppose you aren’t able to access Adobe photo editing software. Some free online sites can do this for you. Of course, be wary of what programs you use. These programs are helpful for the people who have found images they like or even taken themselves, who want to have small prints around the house. I would not trust online software to make files for big prints, but you can use your judgment. But another good software option for enlarging photos besides the Adobe ones is Reshade Image Enlarger. This program is created solely for upsizing images. I am a fan of this software because everything you need is presented simply, even though the interface looks dated. For enlarging programs, ease is everything. This software can get your image to the size it needs. But it can’t handle the quality as well as Adobe programs. Again, this is because the program has to make up information in the files.
4. Make a Test Print to Check Color and Quality
The best way to check if your file will hold up well enough is to make a test print. Many printing labs now offer this service as it can save time and money. You can do this yourself by printing the image. Or, if it’s a big image, crop a cross-section that can fit on a smaller piece of paper and check for yourself. Then you will have an idea of what the picture will look like. This is not only good for checking the quality of the image. But also for how the printer handles the colors.
How Do You Get the Best Quality Prints?
The number one way to ensure you have the best file to print from? Make sure your camera is shooting at its full capability. You always want to photograph with the most significant file size available. If you’re not already shooting in the RAW image setting, consider starting as soon as possible. Taking photos with a lower ISO is also a great way to be conscious of your image’s sharpness. The lower ISO reduces your shutter speed. And a tripod allows you to compensate for this. Luckily, camera phones are excellent nowadays. Most smartphones now have cameras with upwards of 10 MP (megapixels). Their images will be sufficient to get a good-quality photo print. Lastly, if scanning old pictures, ensure the scanner is working at its highest resolution. The scanner is technically taking a picture of your photo. The better quality the scanner’s settings are, the more faithful the digital file will be to the image.
Conclusion
It is possible to enlarge an image without losing too much detail. But remember that the computer is blind. It makes these changes through its algorithms, following patterns. But it doesn’t understand how it will look to us. This process means you must have an eagle eye when checking the final render of your image when upsizing. Again, the best way to handle this situation is to prepare. Have your camera set to photograph RAW image files. And make sure you edit those direct files.